Installing a lighted license plate holder
I went down to the county tax office and had the following Q&A:
Q: Are golf carts required to have a license plate?
Q: Starting when?
Q: What happens to carts without one?
Q: When does that start?
Q: Front and back plates?
Q: Does it have to be lighted?
Q: How much is it?
I filled out the form, wrote a check, and got my plate. The thing that I kept thinking about was whether or not they would let you drive at night without a lighted plate, so I thought that I'd get ahead of the game and find a lighted mounting plate. I located one on Amazon:
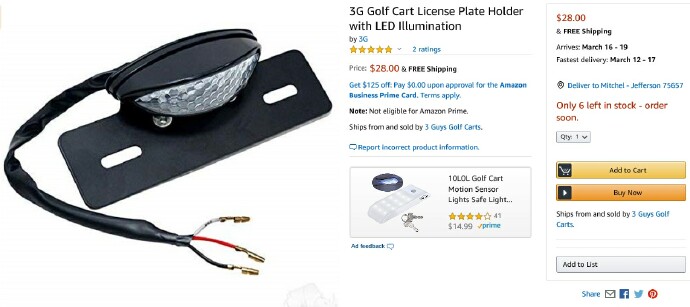
I ordered it, and although it wasn't part of the Amazon Prime program, it would be on my doorstep in just under a week. One important thing to consider is placement. If the authorities can't easily see it, it's the same as not having one. On the other hand, you don't want to put it somewhere on the back of the cart where it will be continually bumped as people get on and off - especially the back seat. If you have a folding back seat, the plate needs to be equally visible with the seat in the up or down position. The other consideration is getting power to the light - the juice to run it has to come from somewhere, so that's something else to factor in to the plate placement.
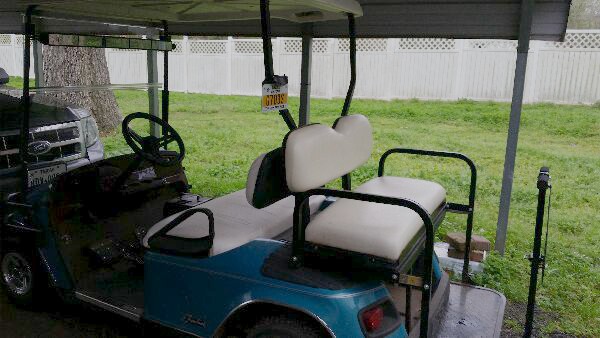
I did get it mounted on the cart, and I have to say, it looks really great. I chose to put it just behind the driver's seat on the roof brace, just above the back seat - as you can see in this photo.
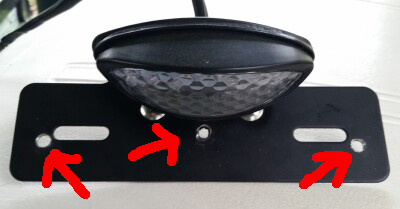
The next problem was the wiring. Although there were no instructions or schematics included with the light, there was a stamp on the front lens that said, "12V" so I assumed that if I could get 12 volts to the light it would work. Not only that, though, but I wanted it to be controlled by the light switch on the dashboard - if the front lights were on, I wanted the plate light on. One question that I encountered was that there were three wires coming out of the light - red, black, and yellow. I therefore took the light to the Table of Golf Cart Knowledge, which convenes at lunchtime every Friday, and humbly sought their counsel on the matter. After the license plate holder was passed around for examination, there were a number of ideas about the yellow wire. The consensus was that if I ignored the yellow wire, and used the red and black wires, everything would be fine. So while that worked, I could tell that there was more to the light than I was experiencing. I therefore picked up the phone and consulted the Chairman, and took the light to his shop for some diagnosis. After some experimentation with a 12V power supply and a meter, here is what we determined:
Even though the listing didn't advertise it, this is quite a diversified little light. There is a white LED light that shines down on the license plate, and a red light that acts as a tail-light under normal night-time operation, and lights up in brighter red when the brakes are pressed.
Happy carting, |